
Have you ever tried to record some video or audio and video material using VirtualBox? Then you probably find out that the solution is too slow for your needs. With FFmpeg you are able to record not only video but also audio.
Installation
Install FFmpeg for your operating system, e.g. sudo apt install ffmpeg or if you are running gentoo Linux, do:
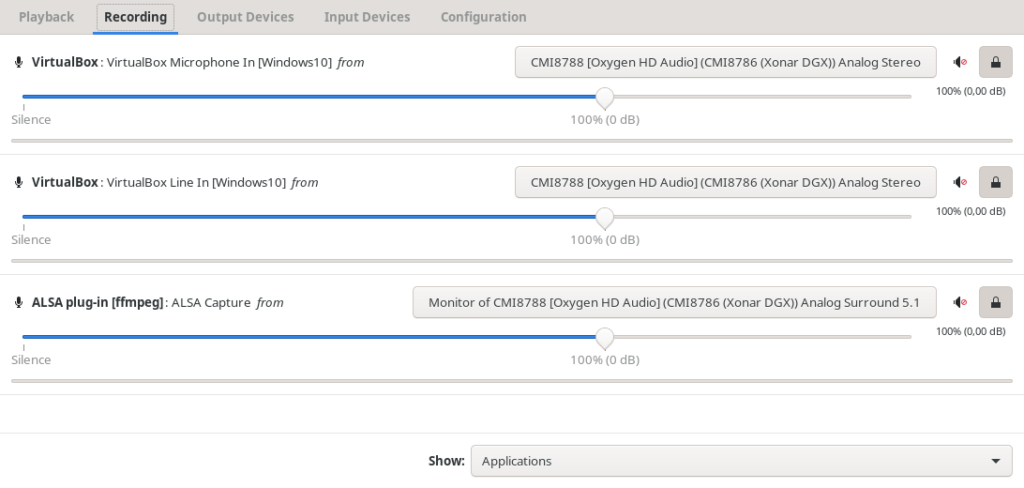
emerge -av pavucontrol ffmpegThen launch pavucontrol, start ffmpeg in your shell (just with some random parameters, only to see the third entry in the image below) and change the recording device in pavucontrol to monitor the audio from your device (third entry, Monitor of):
Running FFmpeg:
ffmpeg -video_size 1920x1080 -framerate 25 -f x11grab -i :0.0+0,+360 -f alsa -i default -ac 2 output.mkvEnsure that you use the correct resolution and starting point (here: +0,+360). You can find the location on X using a system settings configurator or for example the nvidia display settings. Maybe choose pulse instead of alsa if it does not work:
ffmpeg -video_size 1920x1080 -framerate 25 -f x11grab -i :0.0+0,+360 -f pulse -i default -ac 2 output.mkvAlternatively you can change the device from -i default to a specified device, e.g. hw0:0,0.
ALSA loopback
In case that you need an ALSA loopback device for further experiments, set this in your kernel: CONFIG_SND_ALOOP=m or CONFIG_SND_ALOOP=y.
See also:
[1] https://askubuntu.com/questions/682144/capturing-only-desktop-audio-with-ffmpeg
[2] https://wiki.debian.org/audio-loopback
[3] https://wiki.gentoo.org/wiki/ALSA
[4] https://raspberrypi.stackexchange.com/questions/49946/best-ffmpeg-configuration-for-recording-videoaudio-with-raspberrypi-and-usb-web